Publish at WorkflowHub
Publish and cite your results
Once the provenance metadata for your COMPSs application has been generated, you have the possibility of publishing your results (i.e. both the workflow and the workflow run) in WorkflowHub, the FAIR workflow registry, where a DOI can be generated and used as a persistent identifier to cite your experiment in a scientific paper. Detailed documentation on how to use the WorkflowHub web site can be found in their Documentation section.
The steps to achieve the publication of a COMPSs execution are:
If you didn’t use the
-zflag to generate the provenance, you need to pack the resulting crate sub-directory (i.e.COMPSs_RO-Crate_[timestamp]/) in a zip file. Thero-crate-metadata.jsonfile must be at the root level of this zip file. Example:
$ cd COMPSs_RO-Crate_20250514_153121/
$ zip -r ~/Desktop/crate.zip *
Login or create an account in the WorfklowHub registry. You can use your GitHub credentials to easily log in.
Before being able to contribute workflows to the registry, you need to join a WorkflowHub Team. You can either create your own team, or join an existing one, as shown in the following Figure. For testing purposes, you can join the COMPSs Tutorials team.
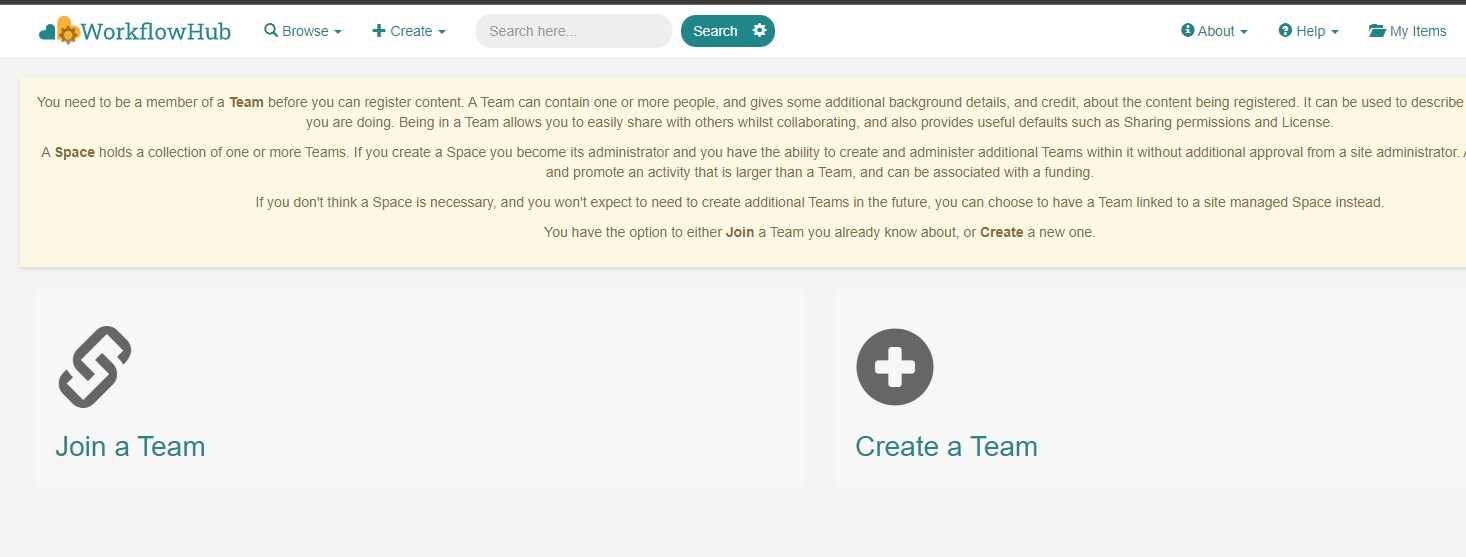
Figure 48 Join or Create a Team at WorkflowHub
Once you belong to a Team, you will be able to use the big
Contributebutton at the WorkflowHub home page.Alternatively, the menu
Createat the top of the web page can be used, selectingWorkflow.
Select the third tab
Upload/Import Workflow RO-Cratetab,Local file, and browse your computer to select the zip file prepared previously. ClickRegister.Review that the information automatically obtained from the workflow provenance is correct.
Select the
Teamsthat this workflow will belong to (mandatory).Select the visibility and teams’ permissions for your workflow in the
Sharingsection (for both general public, and for the WorkflowHub Teams where this workflow will be added).Click
Registeragain.
Warning
WorkflowHub Teams may have default sharing policies defined when they are created. Thus, when linking your workflow to a team, you can select if you want to apply the Team’s default policy or not.
Tip
The crate (i.e. folder COMPSs_RO-Crate_[timestamp]/) can also be uploaded to GitHub, and then imported from
WorkflowHub using the second tab option Import Git Repository. See an example here: https://doi.org/10.48546/workflowhub.workflow.1076.2
After these steps, the main summary page of your workflow will be shown, where three main tabs can be selected (see https://doi.org/10.48546/workflowhub.workflow.484.1 to check out an example directly at WorkflowHub):
Overview: where the workflow type, workflow description, and workflow diagram are shown.
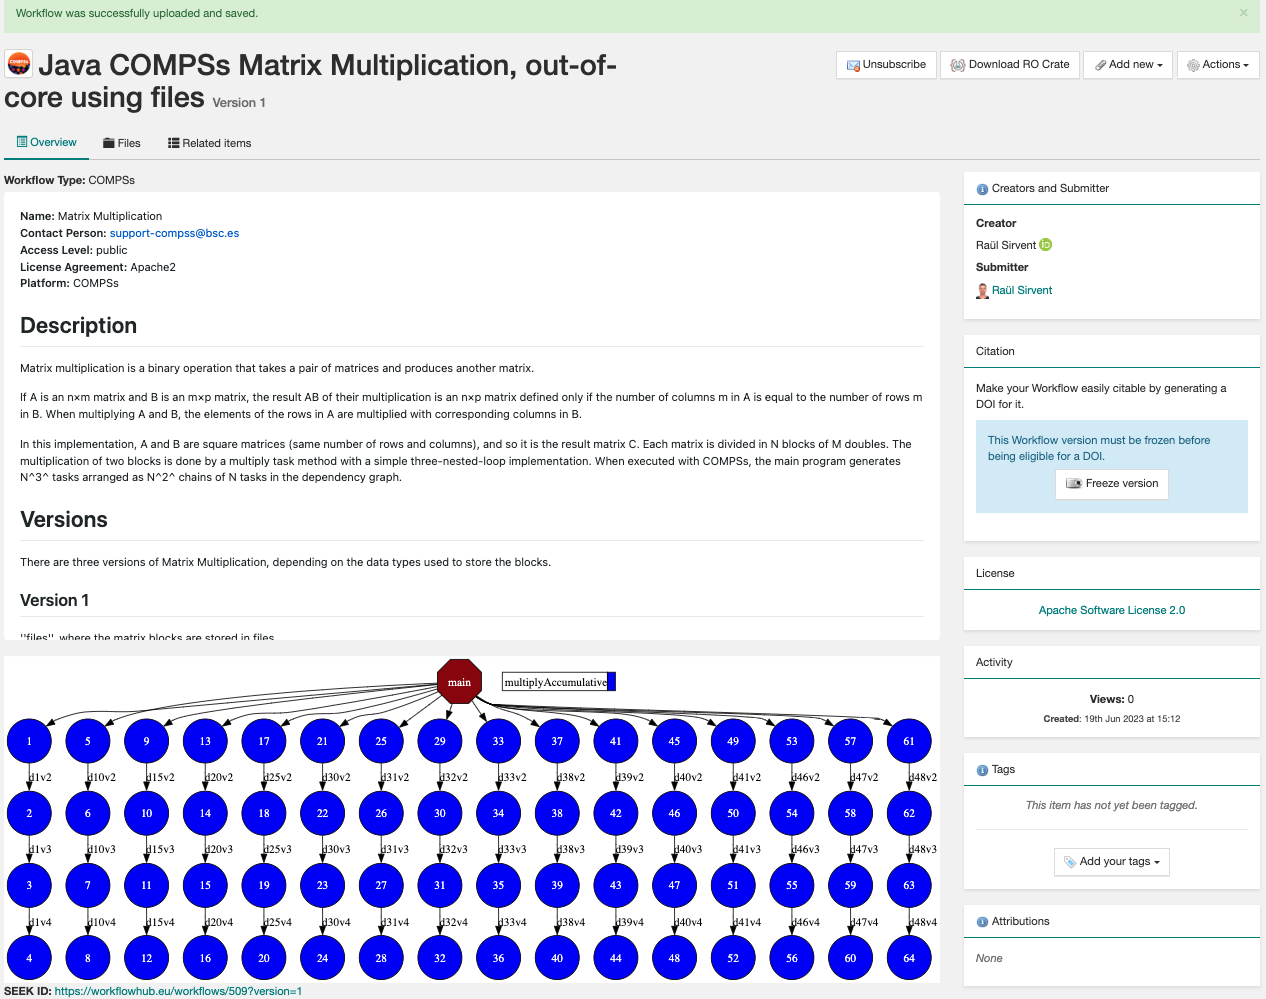
Figure 49 Overview tab information
Files: where you can browse the uploaded content of the crate (see Resulting crate for details on the crate structure).
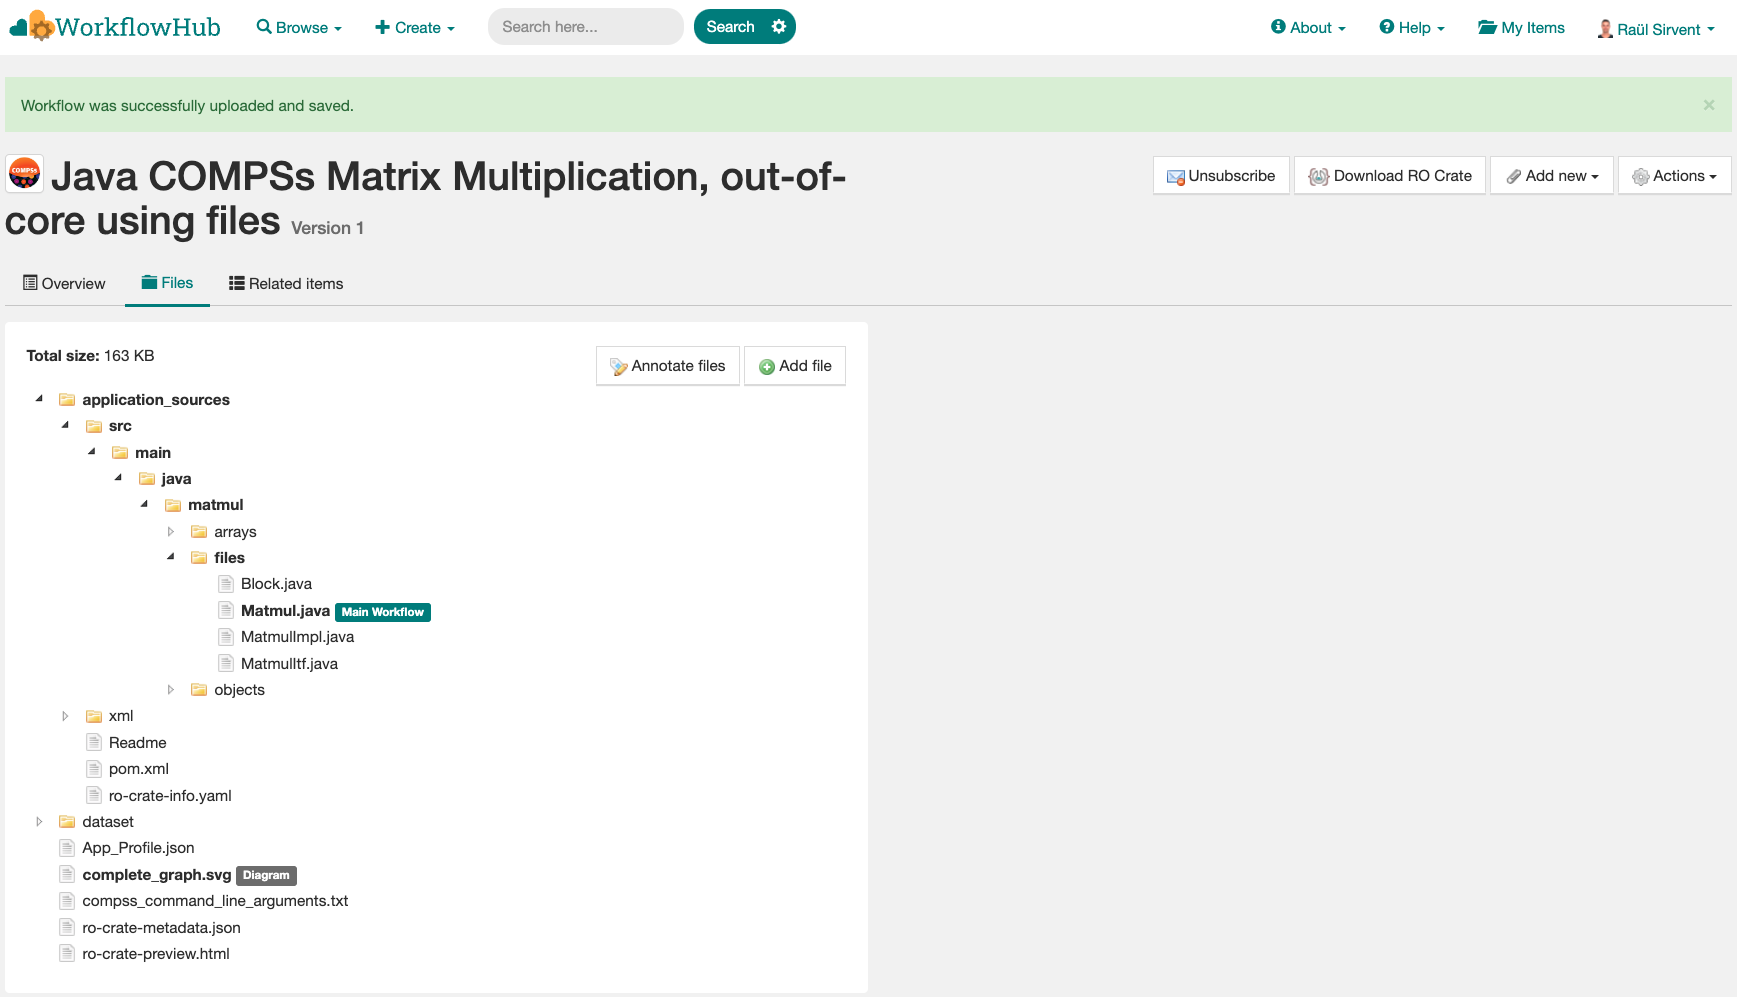
Figure 50 Files tab information
Related items: where you can find any other entities related to this workflow (i.e.
People,Spaces,Teams,Publications,Presentations,Collections, …)
At this point, before freezing and generating a DOI for the workflow, you may consider if remote datasets need to be added to the workflow. See Section Large datasets for a detailed guide on how to do that.
If everything is correct, the next step is to generate a DOI (i.e. a persistent identifier) for your workflow. The necessary steps to achieve this are:
Warning
Before generating a DOI for your workflow results, make sure everything uploaded is correct and in its final version, since a DOI is ment to be a permanent reference, and, once generated, erasing a DOI is not easy.
Freeze your workflow version, either from the
Overviewtab,Citationbox,Freeze versionbutton, or from theActionsmenu,Freeze version.
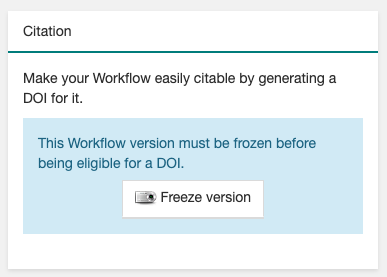
Figure 51 Freeze button in the Citation box
Once frozen, a new
Generate a DOIbutton will appear in theCitationbox. This can be also found in theActionsmenu,Generate a DOI. Finish the generation by clickingMint DOI.
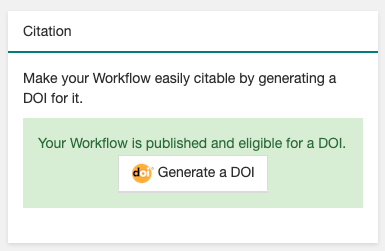
Figure 52 Generate a DOI button in the Citation box
The final generated DOI for the workflow results can be found in the
Citationbox. The format of the citation can be changed from the dropdown menu inside the box, which has a large number of styles available. One of the most commonly used is theBibTeX generic citation style.
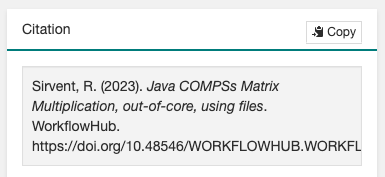
Figure 53 Resulting text in the Citation box, to be used in bibliography
Warning
If no Authors are provided in the YAML configuration file, it won’t be possible to generate a DOI.
See Section YAML configuration file
You can see some examples on previous published workflows:
Java COMPSs Matrix Multiplication (using COMPSs 3.2): https://doi.org/10.48546/workflowhub.workflow.484.1
PyCOMPSs WordCount Example (using COMPSs 3.3): https://doi.org/10.48546/workflowhub.workflow.635.1
PyCOMPSs Matrix Multiplication, out-of-core using files. Example using DIRECTORY parameters executed at laptop, data persistence True (using COMPSs 3.3.1): https://doi.org/10.48546/workflowhub.workflow.1046.1
Tip
When writing the description term of your YAML configuration file (see Section YAML configuration file)
you can use Markdown language to get a fancier description in WorkflowHub. You can find a Markdown language guide
in this site, and an example on how to write it at the YAML configuration files
of the previously provided examples (i.e. in their included ro-crate-info.yaml files).
New version of a Workflow
It is obvious that, as the development of a specific workflow progresses, new versions of what conceptually is the same workflow will be
created. In addition, even if the code remains unchanged, new execution results of the application may also want to be shared
for including them in papers as DOI references (i.e. same algorithm, using different inputs, generating different outputs).
Therefore, a recommended practice is to use the New version feature of the WorkflowHub portal, so the same workflow
page will contain different versions / executions of the same COMPSs application. This is achieved using:
Step 1: Update the code of your COMPSs application, and generate a new run with previous or new results, activating workflow provenance generation.
Step 2: Open the previously existing workflow at WorkflowHub.
Step 3: Select
Actions->New version.If your workflow was imported from RO-Crate, select
Upload/Import Workflow RO-Crateto upload workflow provenance.If you imported the workflow from GitHub, once you have committed your changes / results, select
Import Git Repository. This action will import the latest commit in the repository to WorkflowHub.
Once these steps are finished, the Overview tab of the workflow will show a new entry at the bottom of the page, in
the Version History section of the page. An example can be seen here: https://doi.org/10.48546/workflowhub.workflow.1076.2
Tip
Notice that DOIs can be generated for each of the different versions of the uploaded workflow, so all of them can be properly shared.
Large datasets
As mentioned earlier, whenever a workflow uses or produces a very large dataset, it should commonly not include the data as persistent (i.e. directly included in the crate). If you are keen to include your large datasets, consider using Zenodo to share your crate (see Publish at Zenodo ). WorkflowHub was not designed to host large datasets, therefore they need to be referenced as remote datasets. A rule of thumb is that, if the workflow includes less than ~100 MB of files, it can be included as a persistent dataset. However, for cases where data assets are hundreds of MBs or even several GBs, the remote dataset option must be used. Some external repositories commonly used to share large datasets are:
Warning
The addition of remote datasets must be done before freezing the workflow version and generating the DOI for citation.
Step 1: execute your application adding manually as
inputsoroutputsthe remote dataset reference (i.e. an https URL reference such ashttps://zenodo.org/records/10782431/files/lysozyme_datasets.zip), and most likely withdata_persitence: False.See Section YAML configuration file.
Step 2: upload the workflow run in WorkflowHub.
As described in previous Section Publish and cite your results.
Step 3: add the remote file as a reference in the workflow files:
Filestab ->Add File->Remote URL.Paste the remote URL (e.g.
https://zenodo.org/records/10782431/files/lysozyme_datasets.zip).Specify the file path in the crate (e.g.
remote_dataset/lysozyme_datasets.zip).
Examples on workflows with remote datasets can be found at:
PyCOMPSs Probabilistic Tsunami Forecast (PTF) - Boumerdes-2003 earthquake and tsunami test-case: https://doi.org/10.48546/workflowhub.workflow.779.1
PyCOMPSs Probabilistic Tsunami Forecast (PTF) - Kos-Bodrum 2017 earthquake and tsunami test-case: https://doi.org/10.48546/workflowhub.workflow.781.1
Tip
While the most common choice should be to use data_persistence: False to avoid including any datasets, a mix of
automatically included small datasets, and remote large datasets can be achieved when using data_persistence: True.
In any case, if data is persisted, the content of the dataset/ folder in the crate cannot be modified (i.e. remove
files), because that would invalidate the correctness of the metadata.
Manual re-execution
While the standard way to re-execute a previously published workflow would be through the Reproducibility Service (see Section Reproducibility Service), we here detail how to manually achieve the re-execution of a COMPSs workflow available at WorkflowHub (e.g. to reproduce the results: submit the same workflow with the same inputs, and obtain the same results). To illustrate this process, we will use different examples:
PyCOMPSs: Matrix multiplication with data persistence: https://doi.org/10.48546/workflowhub.workflow.838.1
PyCOMPSs: Matrix multiplication without data persistence: https://doi.org/10.48546/workflowhub.workflow.839.1
Java COMPSs Matrix Multiplication, out-of-core using files, reproducible example, data persistence True: https://doi.org/10.48546/workflowhub.workflow.1086.1
Java COMPSs Matrix Multiplication, out-of-core using files, reproducible example, data persistence False, MareNostrum V: https://doi.org/10.48546/workflowhub.workflow.1088.1
When data_persistence is enabled, input and output datasets required or generated by the workflow are included in the crate.
This makes reproducibility easier, but it is only convenient when datasets are of a reasonable size (e.g. tenths of MBs).
Click the DOI link of the workflow you want to re-execute (e.g. https://doi.org/10.48546/workflowhub.workflow.838.1).
Click on
Download RO-Crate. The crate of the corresponding workflow will be downloaded to your machine (e.g. in~/Downloads/).Move and unzip the file in a new folder.
$ mkdir ~/workflow-838-1/
$ mv ~/Downloads/workflow-838-1.crate.zip ~/workflow-838-1/
$ cd ~/workflow-838-1/
$ unzip workflow-838-1.crate.zip
Create a
new_outputs/folder to avoid overwriting the includeddataset/outputs/.
$ mkdir new_outputs/
Inspect the submission command, and re-execute the application adapting the flags and parameters. Avoid overwriting the original outputs of the application.
$ cat compss_submission_command_line.txt
  runcompss --provenance=matmul_reproducibility.yaml --python_interpreter=/Users/rsirvent/.pyenv/shims/python3 --cpu_affinity=disabled src/matmul_files.py inputs/ outputs/
$ runcompss application_sources/src/matmul_files.py dataset/inputs/ new_outputs/
Once the execution is finished, compare the new outputs generated with the outputs included in the crate.
$ diff new_outputs/ dataset/outputs/
Click the DOI link of the workflow you want to re-execute (e.g. https://doi.org/10.48546/workflowhub.workflow.1086.1).
Click on
Download RO-Crate. The crate of the corresponding workflow will be downloaded to your machine (e.g. in~/Downloads/).Move and unzip the file in a new folder.
$ mkdir ~/workflow-1086-1/
$ mv ~/Downloads/workflow-684-1.crate.zip ~/workflow-1086-1/
$ cd ~/workflow-1086-1/
$ unzip workflow-1086-1.crate.zip
Create a
new_outputs/folder to avoid overwriting the includeddataset/outputs/.
$ mkdir new_outputs/
If needed, generate a
jarfile from the.javasource files. Either using Maven:
$ cd application_sources/
$ mvn clean package
$ cd ..
or compiling the sources with javac.
$ cd application_sources/
$ find * -name "*.java" > sources.txt
$ javac -d bin/ @sources.txt
$ jar cf jar/matmul.jar bin/
$ cd ..
Inspect the submission command, and re-execute the application adapting the flags and parameters. Avoid overwriting the original outputs of the application.
$ cat compss_submission_command_line.txt
  runcompss --python_interpreter=/Users/rsirvent/.pyenv/shims/python3 --cpu_affinity=disabled --provenance=java_matmul_reproducible.yaml --classpath=jar/matmul.jar matmul.files.Matmul inputs/ outputs/
$ runcompss --classpath=application_sources/jar/matmul.jar matmul.files.Matmul dataset/inputs/ new_outputs/
Once the execution is finished, compare the new outputs generated with the outputs included in the crate.
$ diff new_outputs/ dataset/outputs/
When data_persistence is disabled, the common use case is to re-execute the application in the exact same machine where
the original run was made (e.g. a supercomputer or a cluster). This may be required for reproducing applications that need
specific hardware to run, or to avoid moving large datasets to a different machine by using the machine where data
is located.
Click the DOI link of the workflow you want to re-execute (e.g. https://doi.org/10.48546/workflowhub.workflow.839.1).
Click on
Download RO-Crate. The crate of the corresponding workflow will be downloaded to your machine (e.g. in~/Downloads/).Move and unzip the file in a new folder in the target machine (i.e. the machine where the workflow was executed or where the datasets are accessible from, e.g.
glogin2.bsc.es).
$ scp ~/Downloads/workflow-839-1.crate.zip bsc019057@glogin2.bsc.es:~
  workflow-839-1.crate.zip                            100%   19KB 333.4KB/s   00:00
$ ssh bsc019057@glogin2.bsc.es

$ mkdir ~/workflow-839-1/
$ mv ~/workflow-839-1.crate.zip ~/workflow-839-1/
$ cd ~/workflow-839-1/
$ unzip workflow-839-1.crate.zip
Create a new_outputs/ folder for your re-execution results.
$ mkdir new_outputs/
Inspect the submission command to understand the flags passed to submit the application.
$ cat compss_submission_command_line.txt
  enqueue_compss --provenance=matmul_reproducibility_no_persistence.yaml --project_name=bsc19 --qos=gp_debug --num_nodes=1 --job_name=matmul-DP --lang=python --log_level=debug --summary --exec_time=5 /home/bsc/bsc019057/WorkflowHub/reproducible_matmul/src/matmul_files.py inputs/ outputs/
Inspect the
ro-crate-metadata.jsonmetadata file.Search for the
CreateActionsection,objectterm to see location of input files.Search for the
CreateActionsection,resultterm to see location of output files.You need to ensure you have the corresponding permissions to access the specified locations.
Optionally, you can verify the
contentSizeanddateModifiedfor each input file, to ensure the files in the path referenced match the ones used when the application was originally run.
Re-execute the application adapting the flags and parameters to submit the application. Avoid overwriting the original outputs of the application.
$ enqueue_compss --project_name=bsc19 --qos=gp_debug --num_nodes=1 --job_name=matmul-DP --lang=python --log_level=debug --summary --exec_time=5 $(pwd)/application_sources/src/matmul_files.py /gpfs/home/bsc/bsc019057/WorkflowHub/reproducible_matmul/inputs/ new_outputs/
Once the execution is finished, compare the new outputs generated with the outputs referenced in the crate.
$ diff new_outputs/ /gpfs/home/bsc/bsc019057/WorkflowHub/reproducible_matmul/outputs/
Click the DOI link of the workflow you want to re-execute (e.g. https://doi.org/10.48546/workflowhub.workflow.1088.1).
Click on
Download RO-Crate. The crate of the corresponding workflow will be downloaded to your machine (e.g. in~/Downloads/).Move and unzip the file in a new folder in the target machine (i.e. the machine where the workflow was executed or where the datasets are accessible from, e.g.
glogin2.bsc.es).
$ scp ~/Downloads/workflow-1088-1.crate.zip bsc019057@glogin2.bsc.es:~
  workflow-1088-1.crate.zip                            100%   19KB 333.4KB/s   00:00
$ ssh bsc019057@glogin2.bsc.es

$ mkdir ~/workflow-1088-1/
$ mv ~/workflow-1088-1.crate.zip ~/workflow-1088-1/
$ cd ~/workflow-1088-1/
$ unzip workflow-1088-1.crate.zip
Create a new_outputs/ folder for your re-execution results.
$ mkdir new_outputs/
If needed, generate a
jarfile from the.javasource files. Either using Maven:
$ cd application_sources/
$ mvn clean package
$ cd ..
or compiling the sources with javac.
$ cd application_sources/
$ find * -name "*.java" > sources.txt
$ javac -d bin/ @sources.txt
$ jar cf jar/matmul.jar bin/
$ cd ..
Inspect the submission command to understand the flags passed to submit the application.
$ cat compss_submission_command_line.txt
  enqueue_compss --provenance=java_matmul_reproducible_mn5.yaml --project_name=bsc19 --qos=gp_debug --num_nodes=1 --job_name=matmul --summary --exec_time=5 --classpath=jar/matmul.jar matmul.files.Matmul /gpfs/projects/bsc19/bsc019057/matmul_java_datasets/inputs/ /gpfs/projects/bsc19/bsc019057/matmul_java_datasets/outputs/
Inspect the
ro-crate-metadata.jsonmetadata file.Search for the
CreateActionsection,objectterm to see location of input files.Search for the
CreateActionsection,resultterm to see location of output files.You need to ensure you have the corresponding permissions to access the specified locations.
Optionally, you can verify the
contentSizeanddateModifiedfor each input file, to ensure the files in the path referenced match the ones used when the application was originally run.
Re-execute the application adapting the flags and parameters to submit the application. Avoid overwriting the original outputs of the application.
$ enqueue_compss --project_name=bsc19 --qos=gp_debug --num_nodes=1 --job_name=matmul --summary --exec_time=5 --classpath=application_sources/jar/matmul.jar matmul.files.Matmul /gpfs/projects/bsc19/bsc019057/matmul_java_datasets/inputs/ new_outputs/
Once the execution is finished, compare the new outputs generated with the outputs referenced in the crate.
$ diff new_outputs/ /gpfs/projects/bsc19/bsc019057/matmul_java_datasets/outputs
For large or extremely large datasets (e.g. hundreds of MBs, several GBs), the most convenient way is to upload them
to a public dataset repository (e.g. Zenodo) and reference them as remote datasets related
to the workflow. See Section Large datasets
to learn this process more in detail.
Remote datasets may be commonly included in applications that set data_persistence to False. The idea is that the files
that were not originally persisted are packaged and uploaded to an external repository. However, remote files can also be added
manually using the WorkflowHub interface for any kind of application, thus not only applications without persisted data
may include remote datasets. Because of that, we will describe here the preliminary step of downloading and preparing
remote datasets, but the execution process will be the one described in the corresponding tab in this table (i.e. with
or without data persistence, using PyCOMPSs or Java COMPSs).
Click the DOI link of the workflow you want to re-execute (e.g. Lysozyme in Water with REMOTE DATASET).
Download any remote dataset referenced as such:
Browse the
Filestab of the workflow in WorkflowHub.
Place the datasets in your preferred location, for instance a sub-folder
remote_dataset/inside the downloaded workflow folder.Go to your corresponding reexecution tab, and follow the instructions. Fix any path needed with the newly
remote_dataset/created path.
Warning
If the application includes hardcoded paths, they will need to be manually modified in the code. However, in most
of the cases, if the application has relative paths hardcoded, the application_sources/ folder could be used as
the working directory (i.e. the folder from where you run your COMPSs application).
As seen in the examples above, the steps to reproduce a COMPSs workflow vary depending if the
crate package downloaded includes the datasets (i.e. it
has a dataset/ sub-folder). This is achieved when data_persistence is set to True in the
YAML configuration file. Thus, the data preparation step will change depending on the availability of the dataset
needed for the workflow execution. In addition, any external third party software used in the application (e.g.
simulators, auxiliary libraries and packages, …), must be made available in the new execution environment. For
simplicity, we will not go into the details on how to deal with this environment preparation and we will assume the
target environment has all software dependencies ready to be used.
While the reproducibility process of a COMPSs workflow is quite manual at the moment, we plan to automate it using workflow provenance with the COMPSs CLI (see Section 🪄 CLI). Anyway, reproducing executions in the same machine as the one in the published run (e.g. using the same supercomputer) should be quite straightforward, since the metadata may include references to the location of the inputs and outputs of the workflow. Therefore, the only requirement to reproduce a run would be to have access granted to the location where the inputs are.